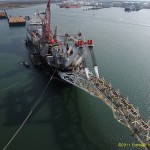
Source : YouTube.com by jaidoms
This video gives good introduction to subsea pipeline installation activities. Here is my description of the activities.
- Time : 00 00
- Transfering linepipe to conveyor operations. This is an anode joint. You can cleary indentified the anode in the middle of the linepipe. Combination of Slings & Simple Monkey bar was used to transfer pipe from Transporation barge to pipe roller.
- Notice the Yellow cylinderical structure on 00:23 – 00:24. I believe it is the Anchor buoy. Notice also the safety helmet color. Its identify the department of workers (I guess).
- Time : 00 35
- This is the lineup station or beadstall where Pipeline end preparation takes place.Activities are Bevelling, Buffing, Pre-Heat, & The red square machine called PFM (Pipe Face Machine 00:43). Pereparation field joint for welding operations. Here also where riggers paint the field joint numbers. I’ll show you the numbers at the end of this video.
- Time : 01 30
- Pipe Fit up. The red equipment call internal line up clamp. Notice the hand movement of welders. He is giving signal to the beadstall operator to move the new linepipe to the direction to fit up the pipe.
- Time : 01 40
- Welding operation. It shows autoweld machine. My personal experience i always use Serimer Dasa auto weld. Ok, lets talk about the station. Normaly this is the pipe ramp activity arrangment for an automatic welding;
- Station 1 : Welding Root and Hot Pass
- Station 2 : Welding Fill
- Station 3 : Welding Fill
- Station 4 : Capping, Visual Inspection and Touch Up Weld
- Station 5 : Touch-up Weld, Repair and Radiographic Inspection
- Station 6 : Repair and Radiographic Inspection
- Station 7 : Field Joint Cleaning & Tape Wrap application. For Cold wrap normaly we use Serviwrap & for Heat Shrink Sleeve we use Raychem
- Station 8 : Mastic Applications… Ooops! Mastic is now “endangered species to the industry” most of the time we use foam (High Density of PolyUrethane Foam – HDPF or Solid Polyurethane – SPU)
- Welding operation. It shows autoweld machine. My personal experience i always use Serimer Dasa auto weld. Ok, lets talk about the station. Normaly this is the pipe ramp activity arrangment for an automatic welding;
- Time : 02 40
- Visual inspection. To ensure the final welding was clear & cleaned from weld splatter & ready for NDT
- Time : 02 49
- None Distruction Test. or NDT to check for welding quality & ensure no defect.
- From beginning until now the videow shows every personnel was wearing a full PPE (Personal Protective Equipment) but sadly when it comes to the NDT personnel he is not wearing his handglove.
- Notice the orange line on the concrete coated 0311. Its indicates the color coding for the linepipe.
- Time : 03 20
- Station 6 where surface preparation for field joint coating applications. Oh ya, all riggers confirm wearing the blue hat.
- Time : 03 35
- Riggers complete wrapping HSS (Heat Shrink Sleeve) & heat the HSS to ensure it is stick to the field joint surface. Most of the time we use Raychem for this HSS. Congratulations to the riggers, they all comply with safety requirement.
- Time : 04 00
- Riggers installing sea sleave as a container for foam. Foam injection in progress. Notice the numbers of joint painted on the pipe this is joint no 6367.
- Time : 04 36
- Field joint no. 6564 leaving the tunnel via stinger. The whole process beginning again until the end of operations.
Ok this is most of the ‘Sweaty’ activities during pipeline installation. Not any less it shows good brief video for the operations. If i miss out any details shown or not shown in the video, you are invited to comment.


